iOS User Guide
Installation
Search for "koedesk" in the App Store and install it.
Initial Setup
Log In
Logging in is required to use koedesk. On launch you'll see a sign-in-only screen. Tap "Log In" or "Log in with a different account" to open a browser-style sign-in page. You can sign in with Apple, GitHub, Google, Microsoft, or an email address (one-time code).
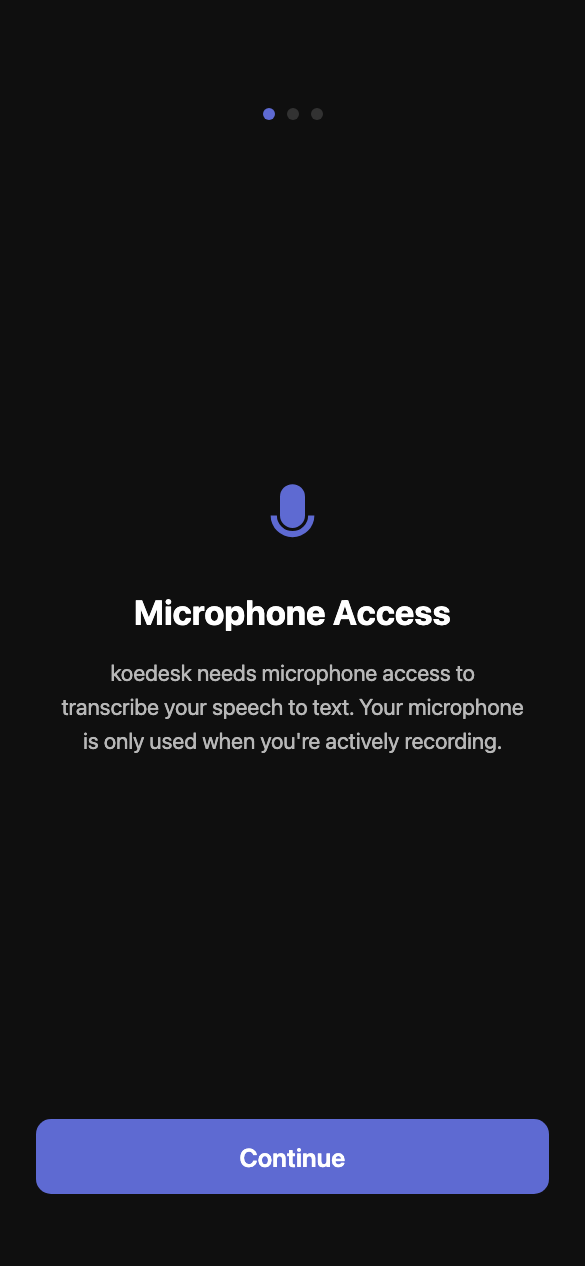
Step 1: Microphone Access
Tap "Continue" to see the standard iOS microphone permission dialog. If you've already denied access, the button changes to "Open Settings" and takes you straight to the iOS Settings app. Microphone access is only requested during this initial setup — if you later turn it off in Settings, you'll be sent back to this screen the next time you open the app.
Step 2: Keyboard Setup
Tap "Open Settings" to add the koedesk keyboard in iOS Settings and turn on "Full Access." Without Full Access, the voice input pill is unavailable and the keyboard falls back to a normal QWERTY layout. You can skip this step with "Set up later" — the in-app voice-to-text feature (without the keyboard) still works in that case.
Step 3: Tutorial
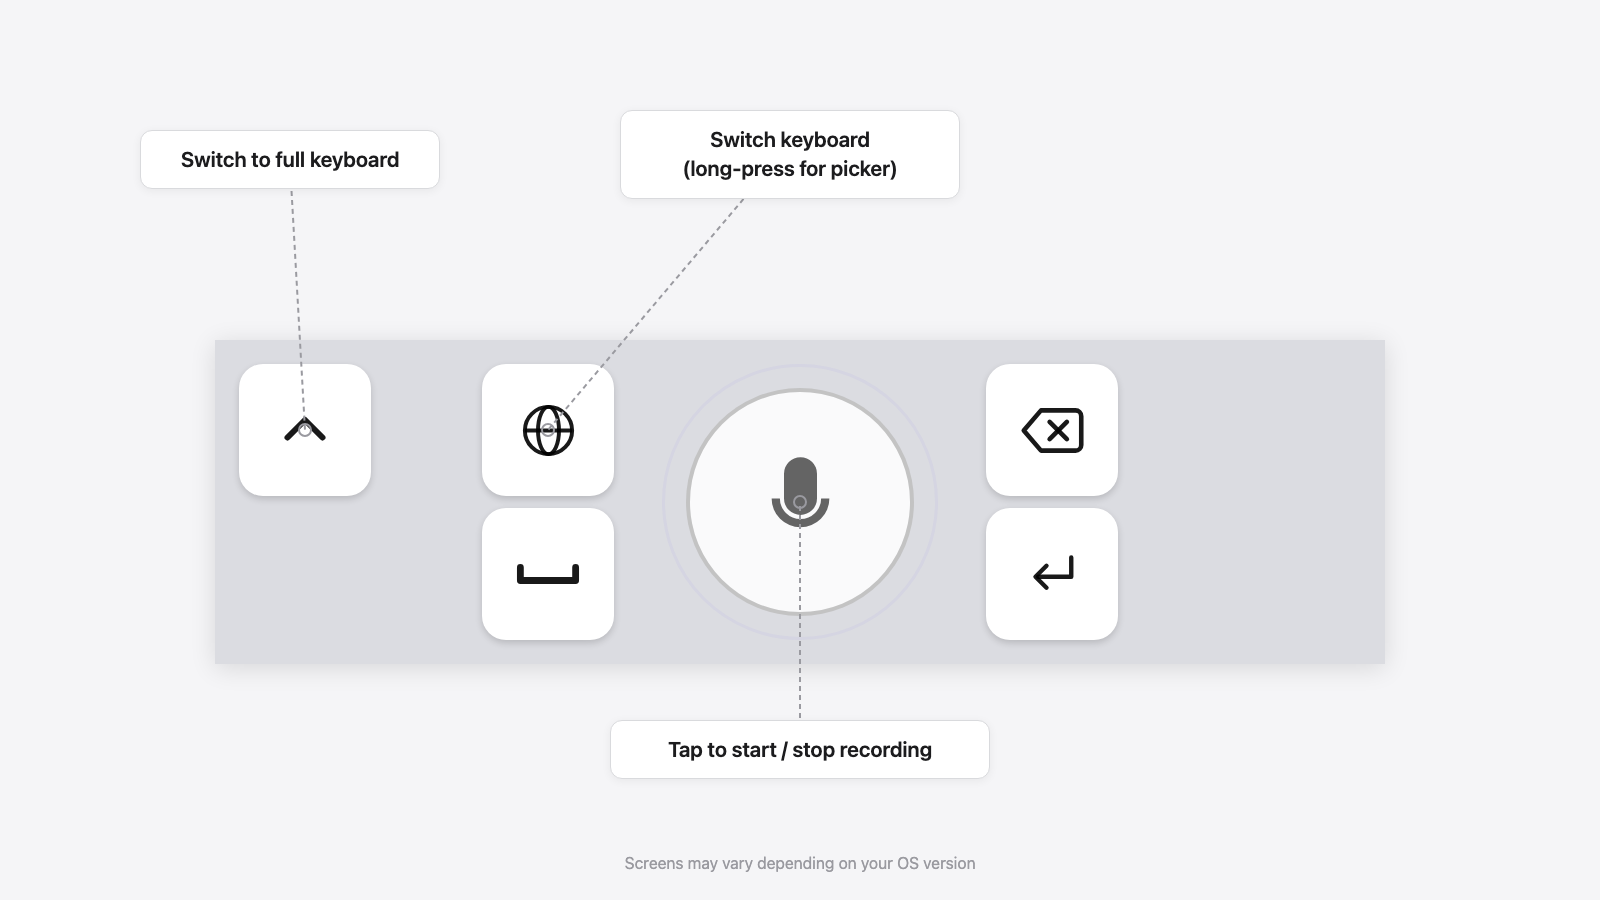
After reviewing how to switch keyboards (hold the globe key) and start/stop recording (tap), tap "Start Using koedesk" to finish setup.
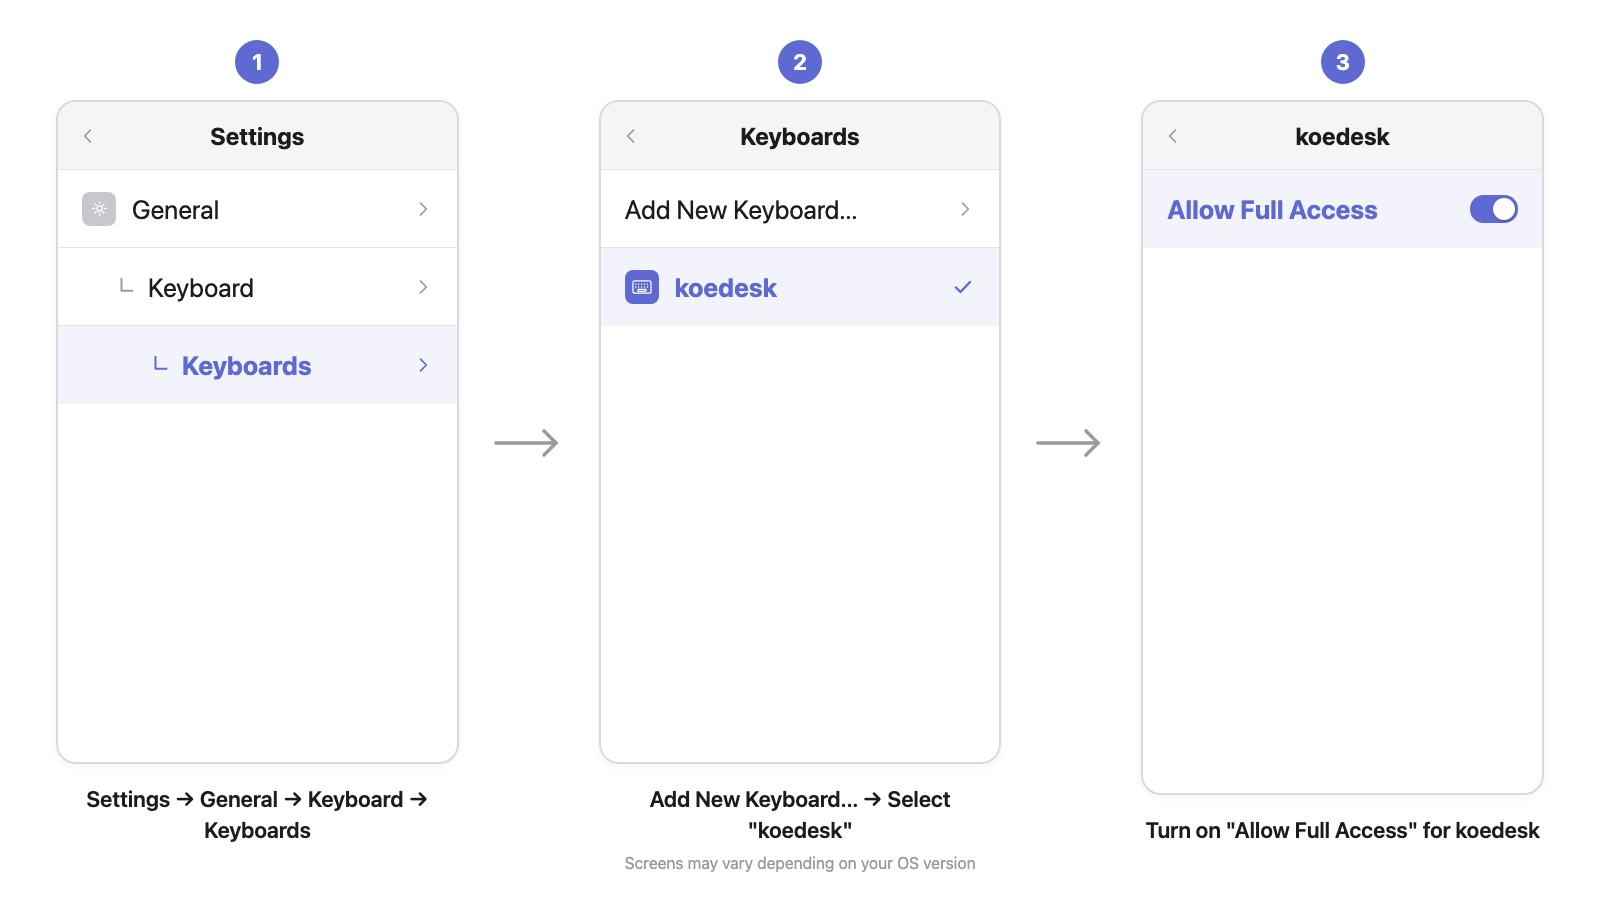
Enable the Keyboard
If you skipped this during setup, or the setting was cleared after an app update, you can enable it manually from iOS Settings.
- Open Settings → General → Keyboard → Keyboards
- Tap "Add New Keyboard..." and select "koedesk"
- Tap the added "koedesk" entry and turn on "Allow Full Access"
Basic Operation
- Hold the globe key and select "koedesk"
- Tap the microphone to start recording
- Tap again when you're done speaking to stop
- The recognized text is automatically inserted at the cursor
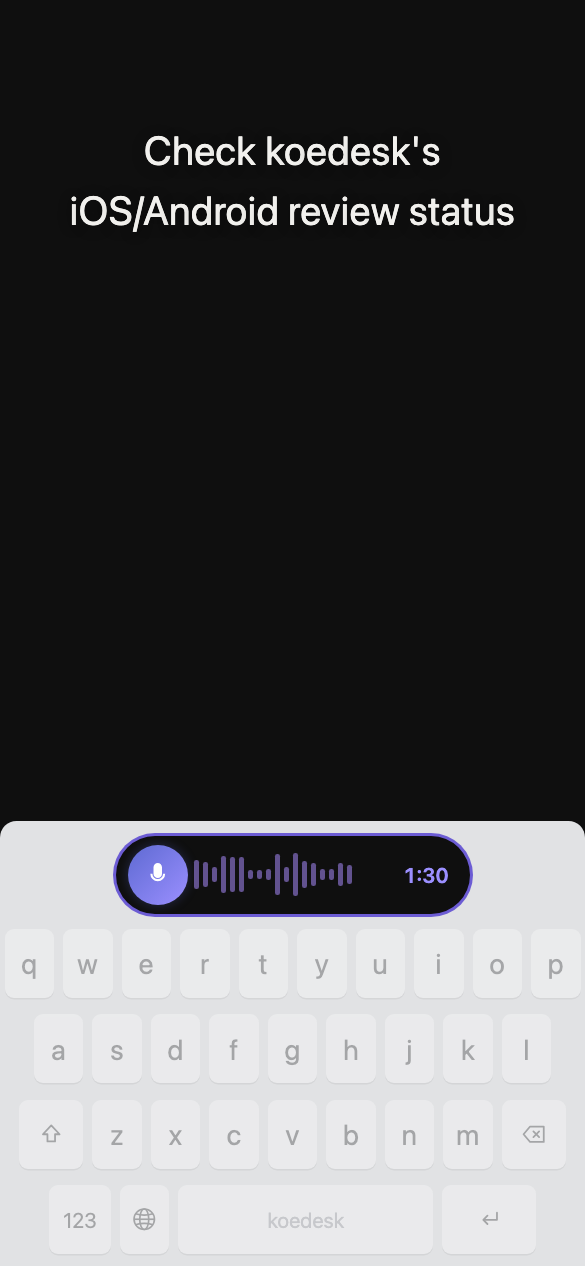
There's no cancel button
Even if you dismiss the pill while processing, transcription continues in the background — the result will be inserted automatically the next time you open the keyboard.
Two keyboard layouts
The keyboard has a compact layout and a full QWERTY layout — switch between them with the button on the keyboard itself.
Tap the globe key to switch to the next input method, or hold it to open the keyboard picker.
If you're signed out, tapping the microphone shows "Tap to sign in". Tap again to open the main app.
Language Settings
In the app's Settings tab, go to "Transcription Language" to choose from 36 languages. There's no automatic detection, so you need to pick a language before speaking. The default is your iPhone's system language if it's supported, otherwise English. This setting also controls the app's display language — changing it switches the menu language too.
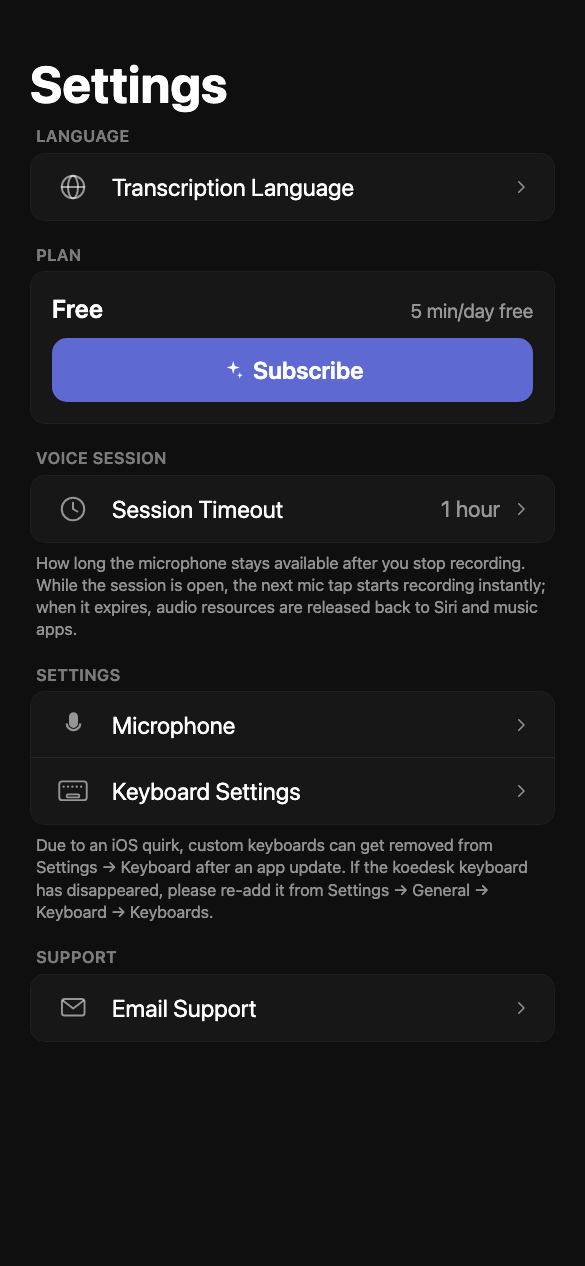
Plan & Free Tier
The free plan gives you 5 minutes per day (resets at UTC midnight). When you hit the limit, the keyboard shows "Daily limit reached. Upgrade to Pro for unlimited transcription." for 3 seconds.
Upgrading
On iOS, upgrading is done only through App Store in-app purchase. You can upgrade from "PLAN" in the Settings tab. If you already have a Pro subscription from the desktop or Android app, iOS only shows a link to check your subscription status — you can't purchase again from within the iOS app.
If your purchase doesn't show up, try "Restore Purchases" on the Account screen.
Troubleshooting
The record button doesn't seem to do anything
If no speech is detected, the recording is silently discarded — no transcription and no error message. This can make it look like nothing happened.
Full Access was on, but voice input still doesn't work
An app update can clear this setting due to how iOS works. Re-enable it via Settings → General → Keyboard → Keyboards.
Recording stops partway through
A single recording is capped at 1 hour. Split longer content into multiple recordings.
What happens without an internet connection
When offline, you may briefly see a raw English error message rather than a localized one.
Voice input in the keyboard stops working after force-quitting the app
The koedesk keyboard relies on the main app process running. If you force-quit the main app (swipe away), voice recognition in the keyboard alone may stop working. We recommend leaving the app running in the background.
Voice input doesn't work in password fields, etc.
In secure fields like password inputs, iOS's own platform behavior may restrict voice input.